Connecting to ActiveSync
This guide connects a CERF guest to ActiveSync 3.8 running in a Windows 98 VMware virtual machine, as a PC Link partnership over an emulated serial link. Windows CE 1.0 (which uses "Microsoft Windows CE Services" instead), other ActiveSync versions, and connecting over a network adapter are all believed to work but are not officially tested yet.
The connection is built in four stages:
- Install and configure com0com - a virtual COM port pair on the host.
- Set up the Windows 98 VM - and hand it one end of that pair.
- Configure CERF - and hand it the other end.
- Finish the connection - wire the guest's serial port to ActiveSync and link up.
If your target is not a virtual machine - a host-installed ActiveSync, or a physical COM port - you can skip the stages that do not apply to you.
Expect rough edges
The serial port forwarder, like everything in CERF, is early, and not every path has been proven to work end to end. Be ready for any outcome.
1. com0com
Download and install com0com from com0com.sourceforge.net.
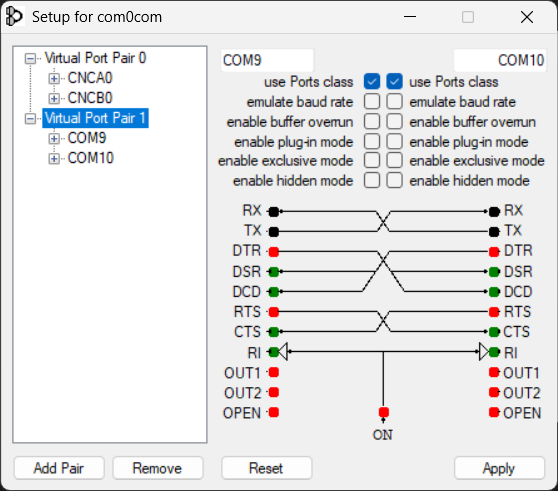
Open the configurator (setupg.exe) and create a virtual COM pair. This guide follows the example
pair COM9 ↔ COM10.
2. Windows 98 VMware VM
Give the VM one end of the pair - COM10 in this example. Follow the setup in the screenshot:
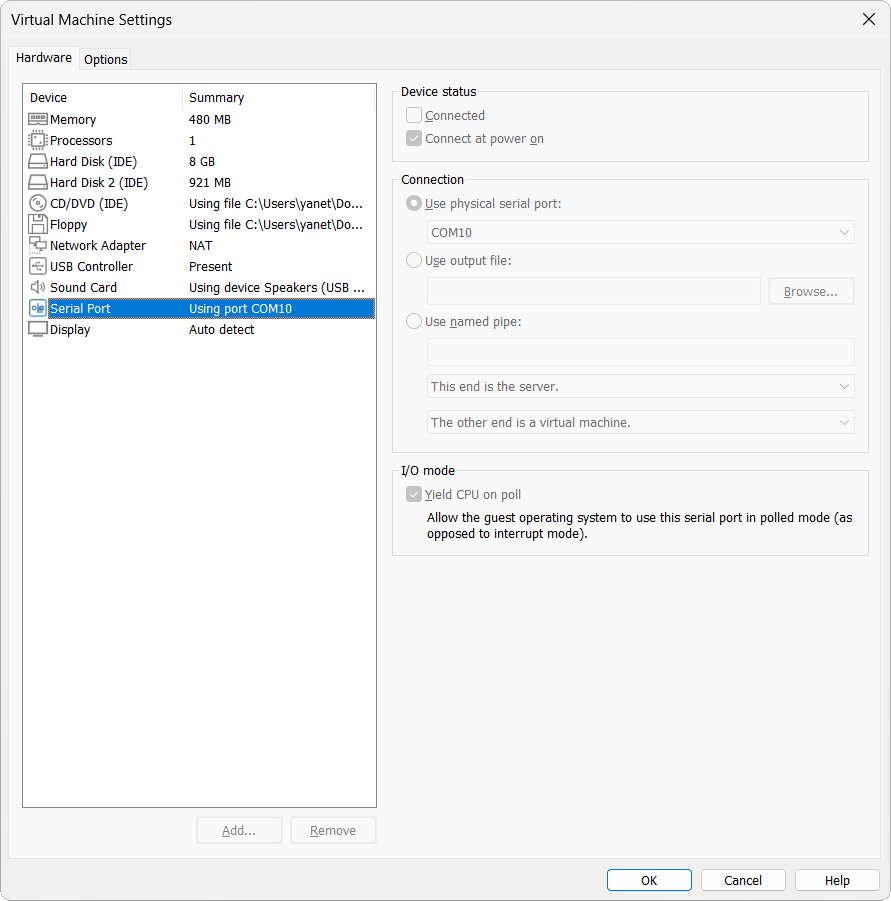
Or add these lines to the VM's .vmx file directly:
serial0.fileName = "COM10"
serial0.present = "TRUE"
serial0.tryNoRxLoss = "TRUE"
serial0.yieldOnMsrRead = "TRUE"
Boot the VM, install the ActiveSync version you want (this guide uses 3.8), then move on to the CERF side.
3. CERF-side serial forwarding
Serial can reach the guest two ways, depending on whether the board has a built-in serial port and whether CERF emulates it. Pick one:
- Serial forwarder via PC Card - for a guest with no built-in serial port, or where CERF does not emulate one. The involved path.
- Built-in serial port - when the board has a working serial port. The simple path.
Either way, you end at Finishing the connection.
Serial forwarder via PC Card
Use this when the guest has no built-in serial port, or CERF does not emulate one.
Launch the device and wait for the desktop.
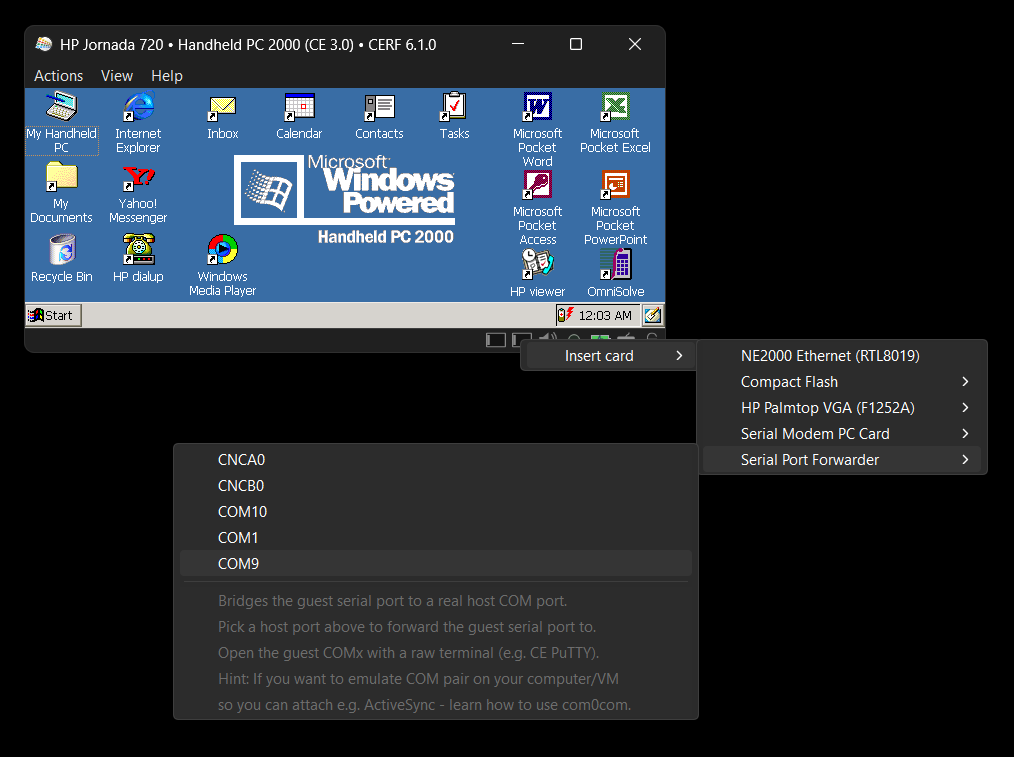
1. From the status bar's PC Card widget (or the Actions menu), pick a free PCMCIA slot and insert a Serial Port Forwarder, pointing it at the other end of your com0com pair. Windows 98 took COM10, so CERF takes COM9.
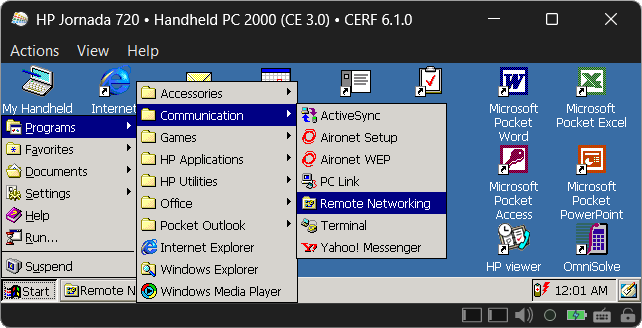
2. Open Start → Programs → Communications → Remote Networking.
3. Open Make New Connection, choose Direct connection, and click Next.
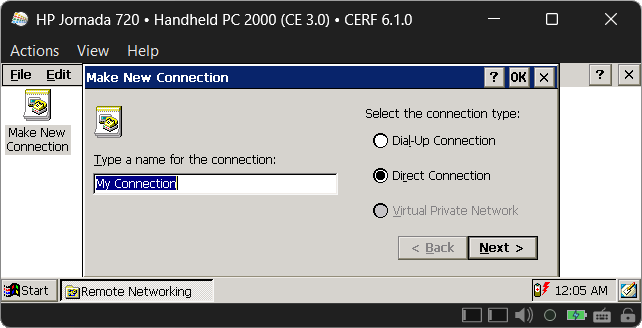
4. Check whether the device list contains CERF-Serial_Forwarder or Serial Cable on PC Card.
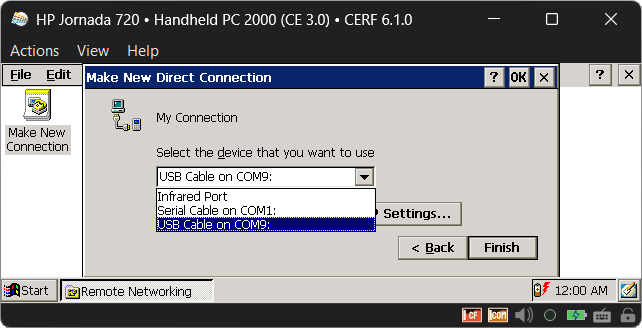
The guest recognised the card correctly - it is ready to use. Continue to Finishing the connection.
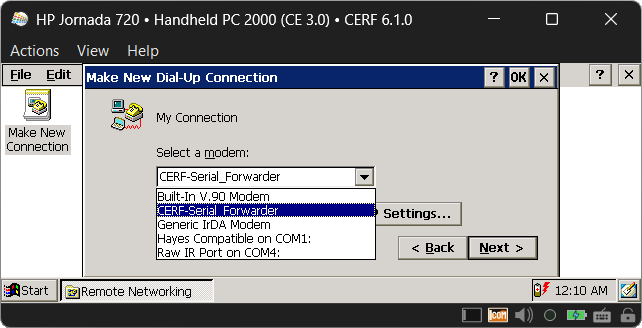
The guest has most likely filed it under dial-up modems instead. Continue to Substituting the modem identity below.
Substituting the modem identity
First, confirm the card really was identified as a modem.
1. Click Back, this time choose Dial-up connection, and click Next.
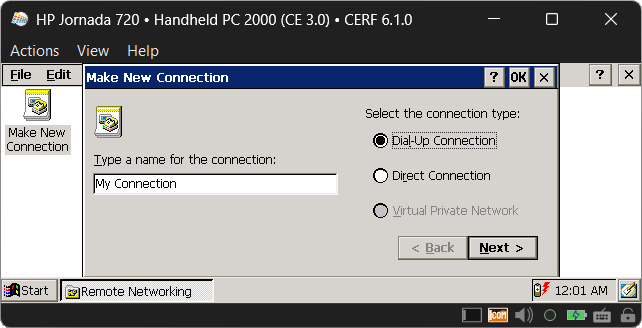
2. Look at the device list. Is CERF-Serial_Forwarder or Serial Cable on PC Card in it?
Warning
If the forwarder does not appear here either, this approach is almost certainly a dead end. You can read on, but the chance the PC Card path will work is close to zero.
3. Copy pccardserial.exe into the guest and run it. It ships in your CERF directory under
ce_apps\<cpu>\pccardserial.exe - open ce_apps\ and pick the folder that matches the guest's
CPU, e.g. ce_apps\mips1\pccardserial.exe. Move it in by whatever means is convenient - for
example, insert a CompactFlash card in another slot, or eject the forwarder, insert a CF card, copy
the EXE to local storage, and re-insert the forwarder.
4. When it runs, does it offer to substitute the identity?
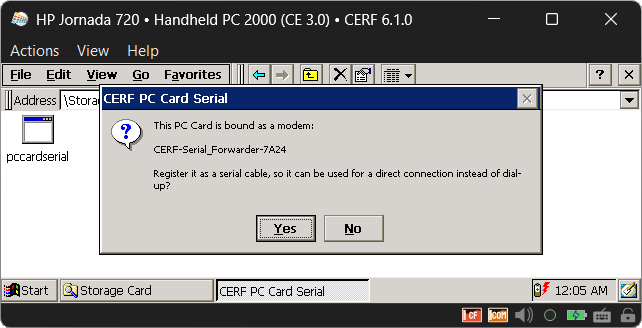
If it does, accept.
Warning
If it offers nothing, the PC Card path is a dead end - there is no other route through it.
5. Eject the forwarder, then insert it into the slot again.
6. Return to the Make New Connection wizard, choose Direct connection again, and check
the device list. If it now includes CERF-Serial_Forwarder or Serial Cable on PC Card, that is
the win - select it and create the connection.
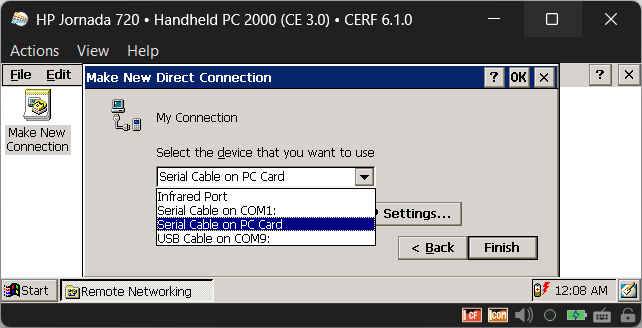
7. Do not connect to it yet - that is the wrong action in the wrong place. Instead, open Control Panel → Communications Properties, and go to the PC Connection tab.
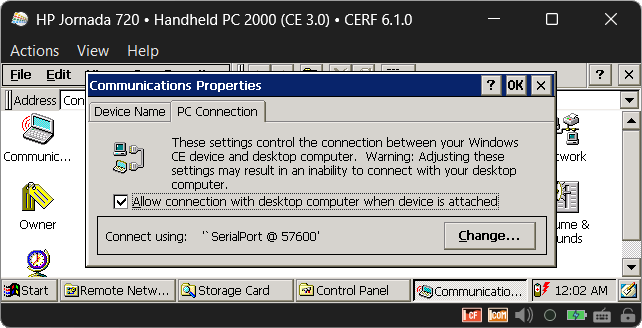
8. Under Connect using:, which is probably still set to the built-in communications peripheral, click Change, and pick the connection you just created. The default name is kept here - literally My Connection.
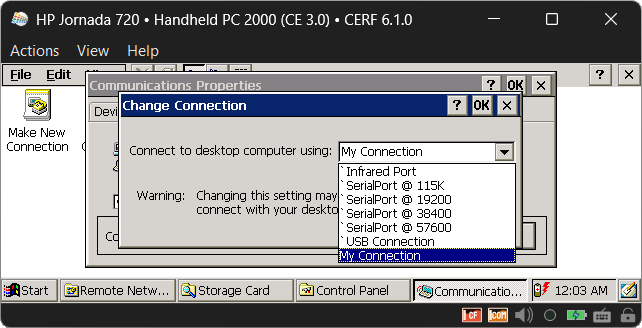
9. Click through the OK buttons to save and close the Control Panel applets. Done - the PC Card forwarder is registered and the guest now treats it correctly. Continue to Finishing the connection.
Built-in serial port
If the board has a built-in serial port, there is no PC Card and no identity to fix - just point the port at your host COM.
Right-click the built-in serial icon in the status bar (or use the Actions menu) and choose Insert card → Serial Port Forwarder, then pick the host COM port - the free end of your com0com pair, COM9 here, since COM10 went to the VM.
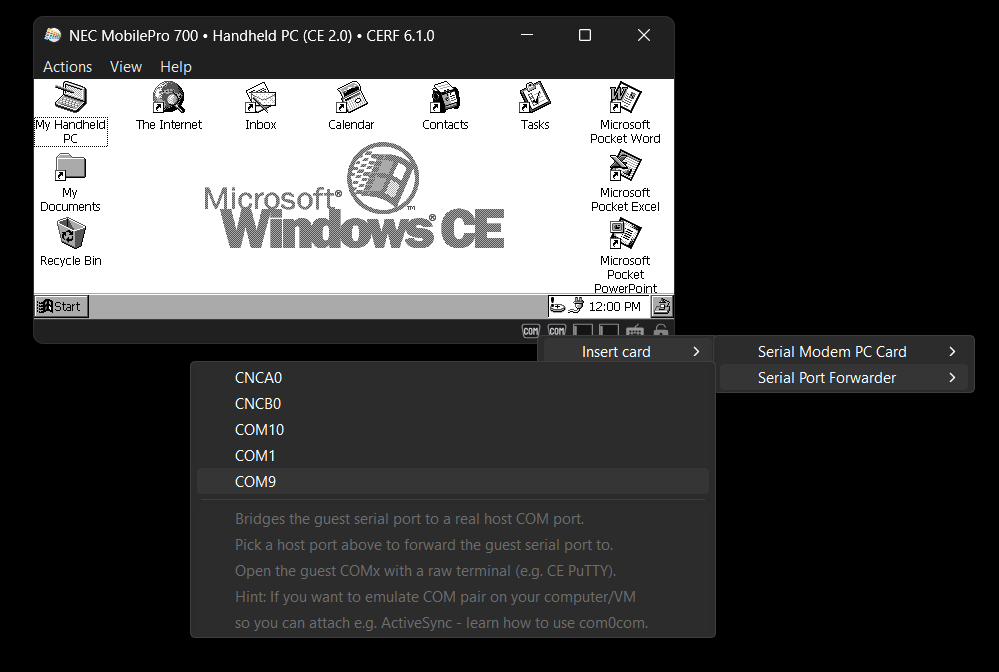
Then go to Finishing the connection.
4. Finishing the connection
1. If you have not already, on the guest open Control Panel → Communications Properties and make sure the correct serial port is selected there. With a built-in serial port this is usually already set.
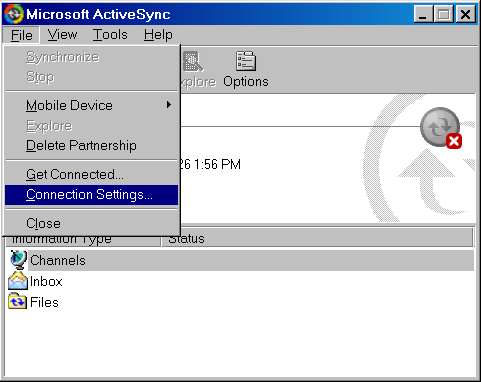
2. With the wiring in place, finish the ActiveSync side. Open ActiveSync 3.8, and from the File menu choose Connection Settings...
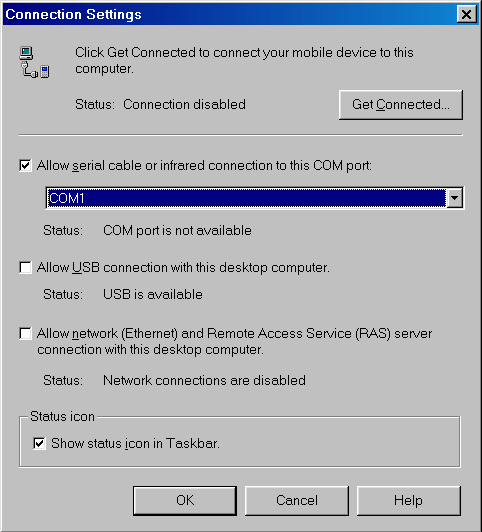
3. Enable Allow serial cable or infrared connection to this COM port: and pick the guest-side COM port below - usually COM1. This is the guest's own port, not the COM9/COM10 pair you set up on the host.
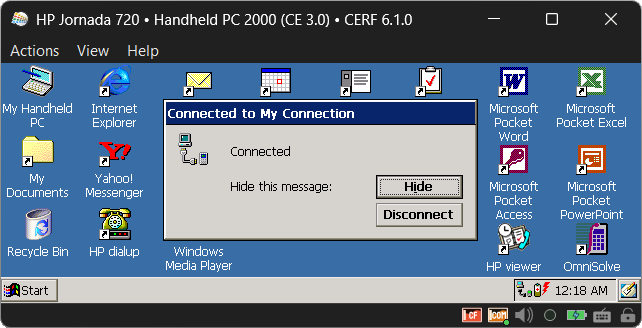
4. Watch the guest right after this - the serial connection window will very likely appear on its own.
If it does not, open Start → Programs → Communications → PC Link to start the connection yourself.
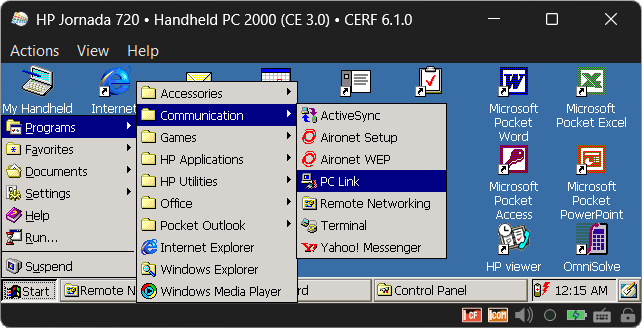
5. Done. The guest should now be connected, and ActiveSync 3.8 should offer to set up a partnership - from here you are in ordinary ActiveSync territory.
Warning
If it does not connect, that is the luck of the draw - the fault could be on the emulation side or in the host wiring. The chain is fragile.